 Complete Guide")
Gibbon is a PLUG & PLAY solution offered by EduGorilla, which facilities educators, and content creators to scale their business online. Along with its industry leading ‘Features’ Gibbon also offers a wide variety of optional ‘Add-Ons’ to educators. Gibbon’s Add-On ensures that the educators pay only for the services they ‘need’.
Single Sign On (SSO) is one of the ‘Add-On’ modules offered by Gibbon. SSO lets students or site admins to sign into the website by using their existing social media accounts (Facebook, Google, and such). Thus, a student/admin does not have to create a separate account (and remember the password!) for logging in.
SSO makes logging in quick, and convenient, which both facilitates students, and assures them of the ‘quality’ of services. Given below is the quick guide on how to enable Sign On (SSO) feature on a client’s portal.
NOTE:
This is a ‘paid’ Add-On of Gibbon, unlocked on subscription.
Regarding any queries:
– Contact EduGorilla’s Support Team on the number: (+91–6393209453)
– Write a mail to [email protected]
– Contact EduGorilla’s Sales Representative
Prerequisites
- Clients must have ‘Admin Access’ to the portal/website.
- Clients must have activated the Add-On service for the portal/website.
How to Enable Single Sign On (SSO) Login?
The steps to enable SSO Login are as folows:
STEP 1: Access the Admin Panel
The first step is to access the admin portal. For this just type the URL of the Whitelabel site, and Log in using Admin Credentials.
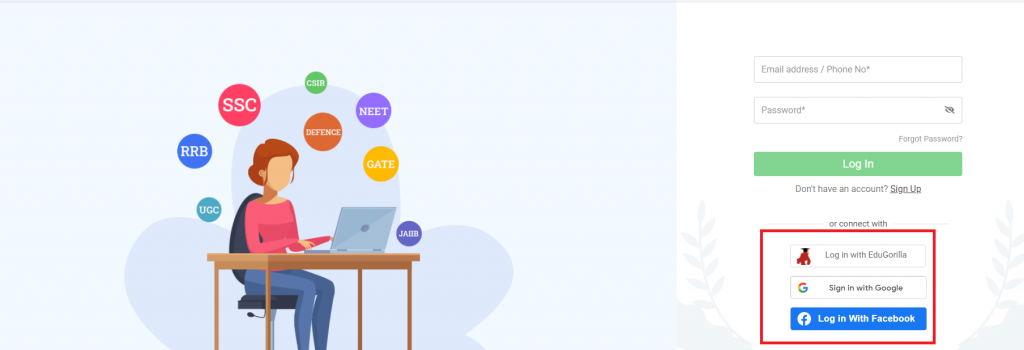
If SSO is disabled, then the Login Screen to the portal would look something like the one given below.

After successful login, the client’s name would be visible on the same spot for ‘login button’. Click on it & select ‘Admin Panel’ Option.
STEP 2: Access the SSO Module
SSO module can be accessed by following the path below.
Path: Dashboard > Settings > Social Login & SSO
The client may face a message resembling: “You haven’t been registered for SSO by the Administrator”
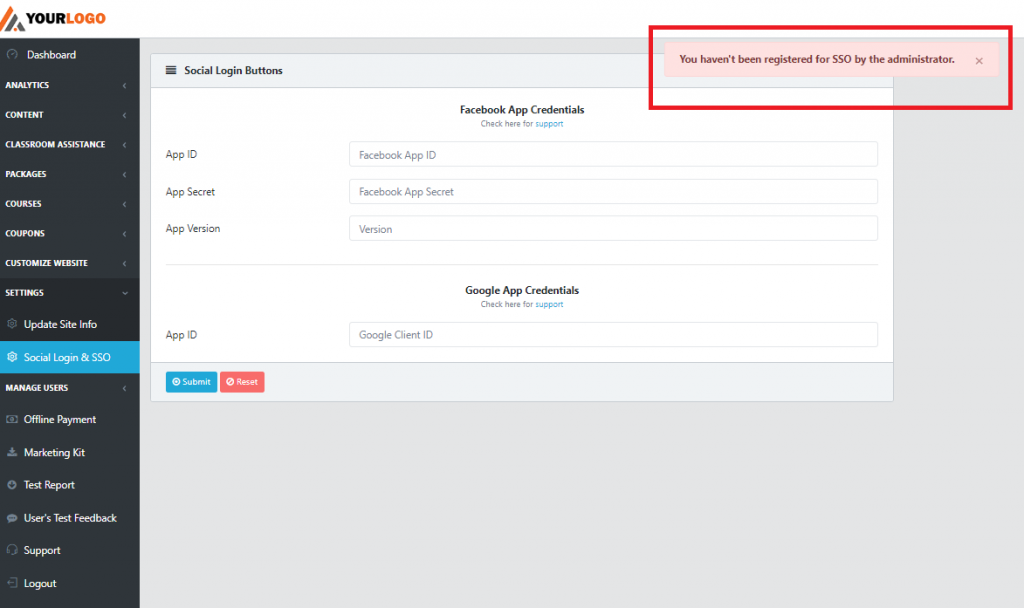
If the message is displayed, contact EduGorilla’s sales representative or write a mail to [email protected] to enable the SSO Add-On
STEP 3: Input Your Social Media Credentials to Enable SSO
All that remains is to enable SSO for the respective Social Media site by providing the respective credentials.
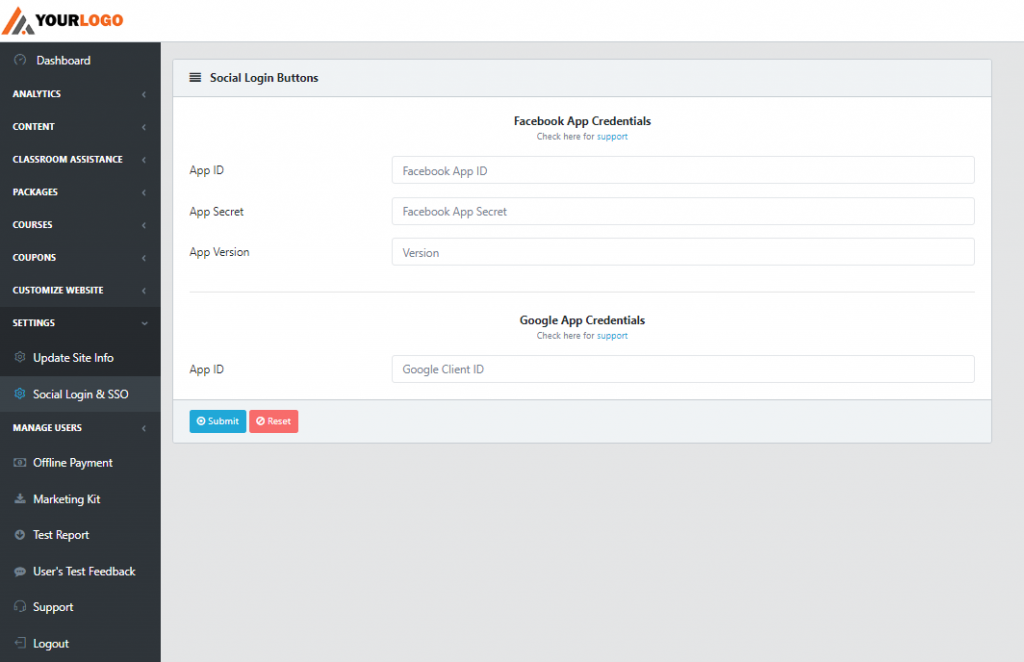
Click on Submit to finish setting up the SSO.
Now the Login page to the website would resemble the one given below:

With the last step, SSO is enabled on the Login Page.
In case clients still have any doubt or want to enable any Feature or Add-on for their portal, please do:
- Contact EduGorilla’s Support Team on the number: (+91–6393209453)
- Write a mail to [email protected]
- Contact EduGorilla’s Sales Representative


