
To develop Online Education Infrastructure in India, EduGorilla offers Gibbon – A Plug & Play Solution for Educators & Brands. Apart from providing indispensable features to educators, Gibbon also provides several Add-Ons so that clients can add more functionalities as and when their business needs them.
LIVE Class & Video Courses is one such Add-On. LIVE class facility lets educators to to conduct, record, and download LIVE classes without any limitations. On other hand, Video Course facility lets educators to upload their videos (or use recorded LIVE Classes) to create & sell online video courses. Read the article below for the complete guide on LIVE class & Video courses Add-On.
NOTE:
This is a ‘paid’ Add-On of Gibbon, unlocked on subscription.
Regarding any queries:
– Contact EduGorilla’s Support Team on the number: (+91–6393209453)
– Write a mail to [email protected]
– Contact EduGorilla’s Sales Representative
Prerequisites
- Clients must have ‘Admin Access’ to the portal/website.
- Clients must have activated the Add-On service for the portal/website.
How To Create a Course, Conduct & Record LIVE Classes with Gibbon?
It’s easy. Gibbon’s LIVE Classes feature is simple and self explanatory to use, so that educators can connect with their students quickly. The steps to create and record live classes are.
Step 1: Dashboard > Courses > Live Class Courses
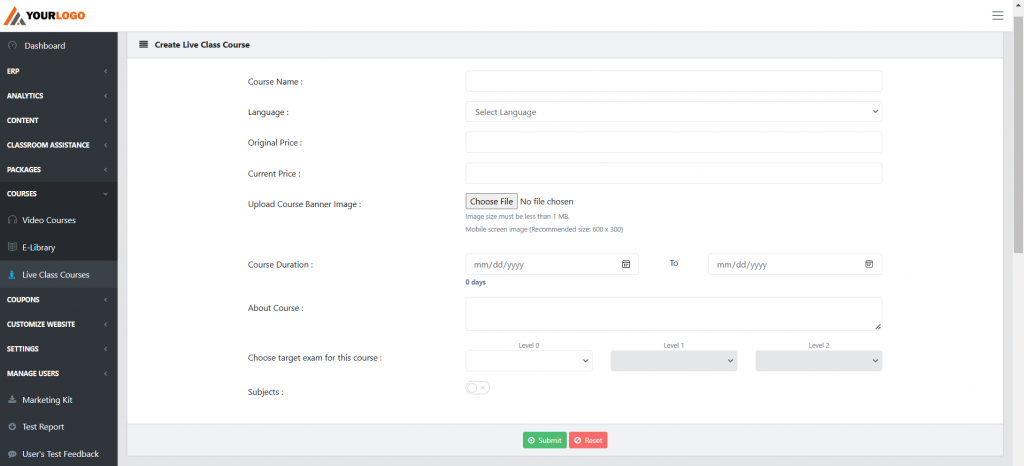
The first step is to visit the Dashboard through Admin Portal, and select the ‘Courses’ option. Then select the LIVE Class sub option. A Screen would appear.
Step 2: Upload Banner, Select Duration, and Choose Exam
To create a live class course you have to set a price for it. To make your course more lucrative with the ‘perception’ of a discount, you have to enter ‘Original Price’ , and then the ‘Current Price’. The LIVE class can also be made ‘Free’ as detailed in Step 6 below.
The option to upload Banners gives a ‘visual touch’ and ‘distinction’ to a particular course, when it is listed with others on your website. Next you have to decide the duration of the course, and write an attractive ‘Course Description’ to grab the attention of the students.
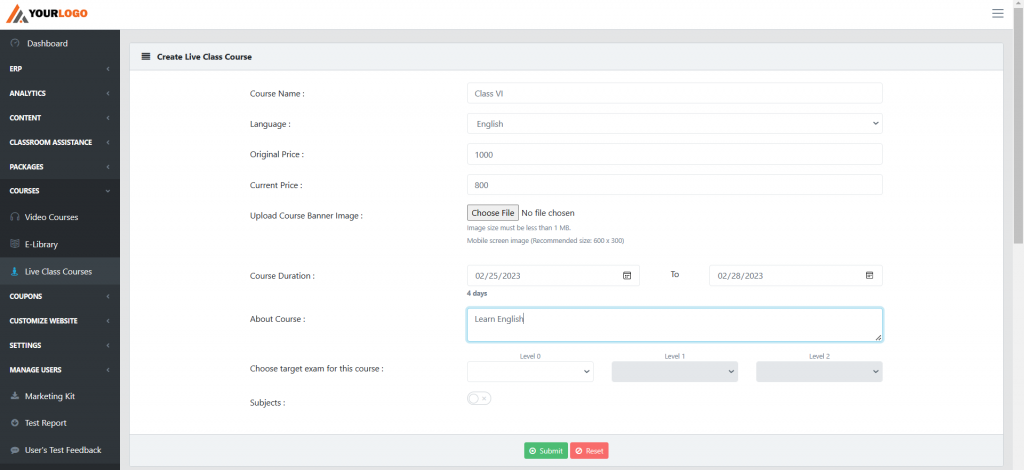
Then choose the target exam, and submit.
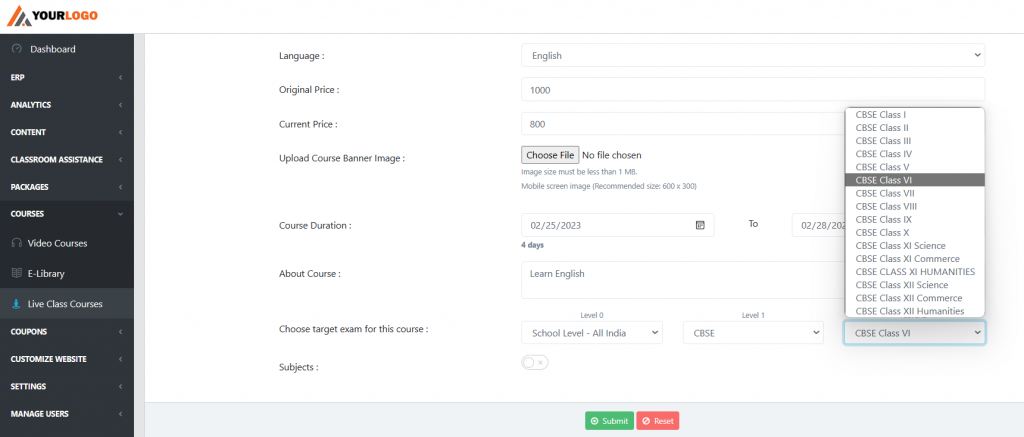
The newly created course would be visible in the ‘Existing Courses’ Section below.
Step 3: Activate the Course, and Add Demo Video
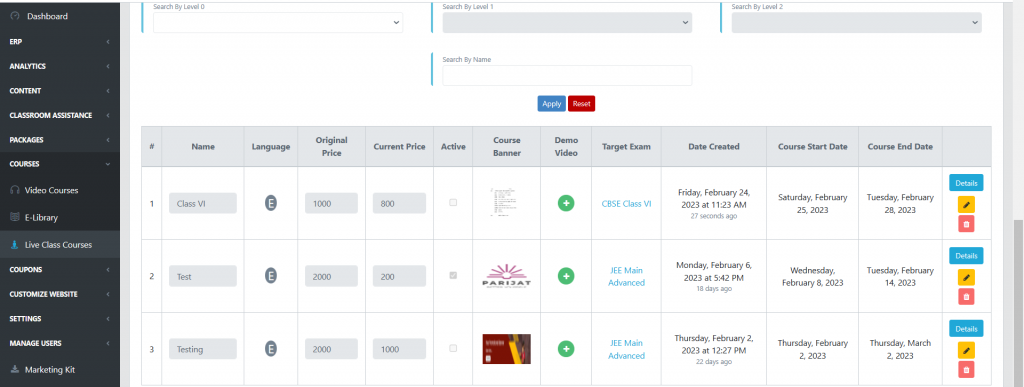
Before scheduling the LIVE classes you would need to make your course visible to your students. To make your course visible by clicking the checkbox under the Active column. You can also add a Demo Video to each course. The Demo Video would act as an ‘introduction’ for your prospective students.
Step 4: Schedule the LIVE Class
To schedule LIVE Class, click on ‘details’ on the right hand side.
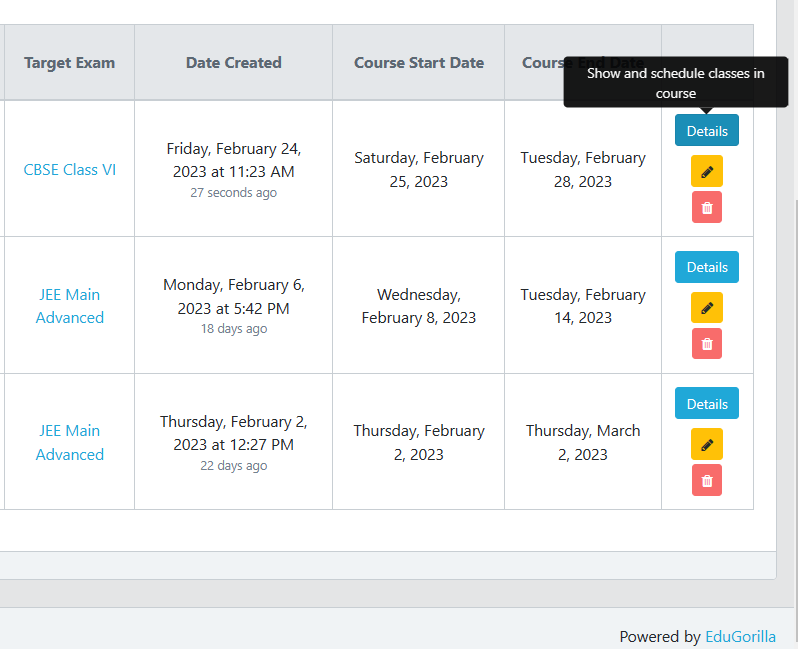
A popup would open. Here you would have the option to Record Your Online Classes, either the camera feed or the screen. You can then set the date and duration of the class.
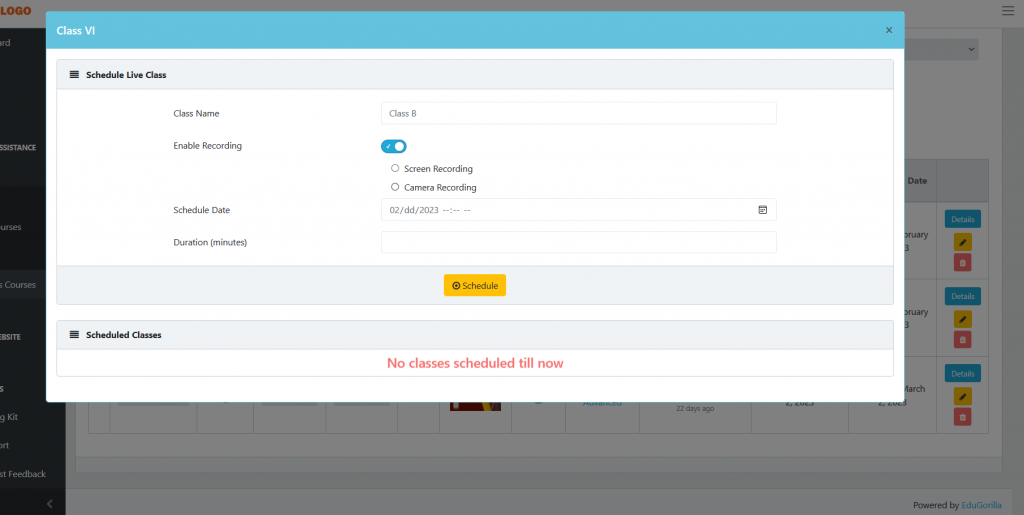
The scheduled class would be visible in the ‘Existing Classes’ section below.
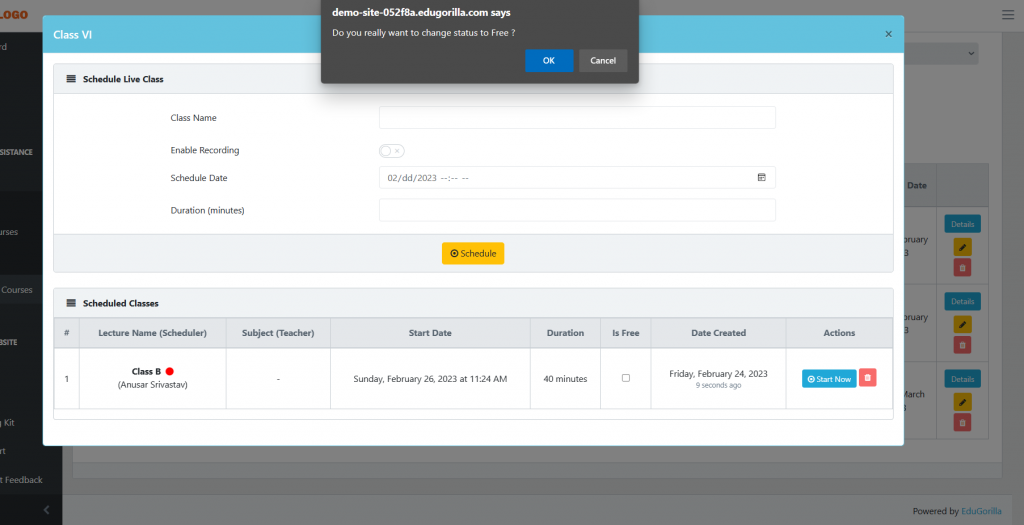
Step 5: Take the LIVE Class
Now all you have to do is take the LIVE class by clicking the ‘Start Now’ option next to the class. In case you want to make the class Free, just check the box under ‘Is Free’ column. A prompt asking to confirm your choice would be displayed on the screen.
How To Create & Sell Online Video Courses with Gibbon?
It’s easy. Gibbon’s Learning Management System (LMS), makes Video course creation simple, so that educators can connect with their students quickly. The steps to create a video course are given below.
Step 1: Dashboard > Courses > Video Courses
The first step is to visit the Dashboard through Admin Portal, and select the ‘Courses’ option. Then select the Video Courses sub option. A Screen would appear.
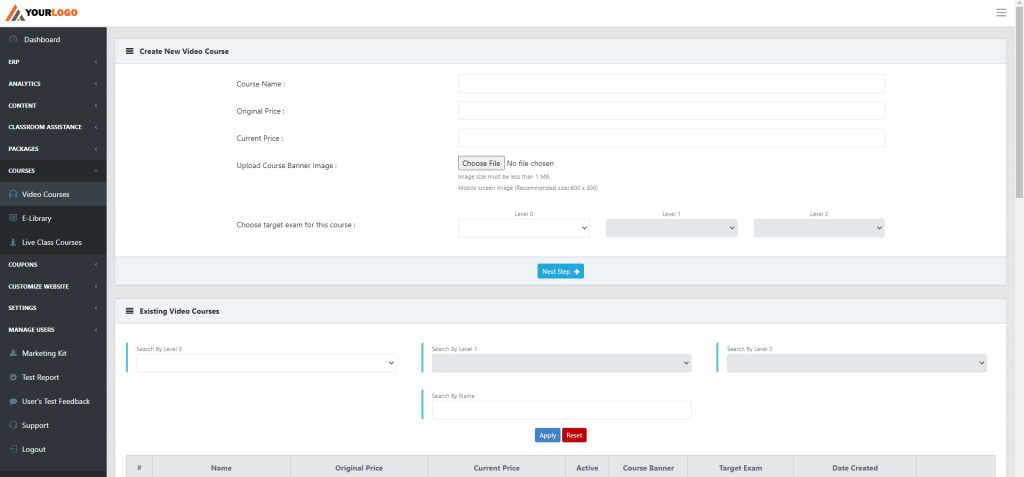
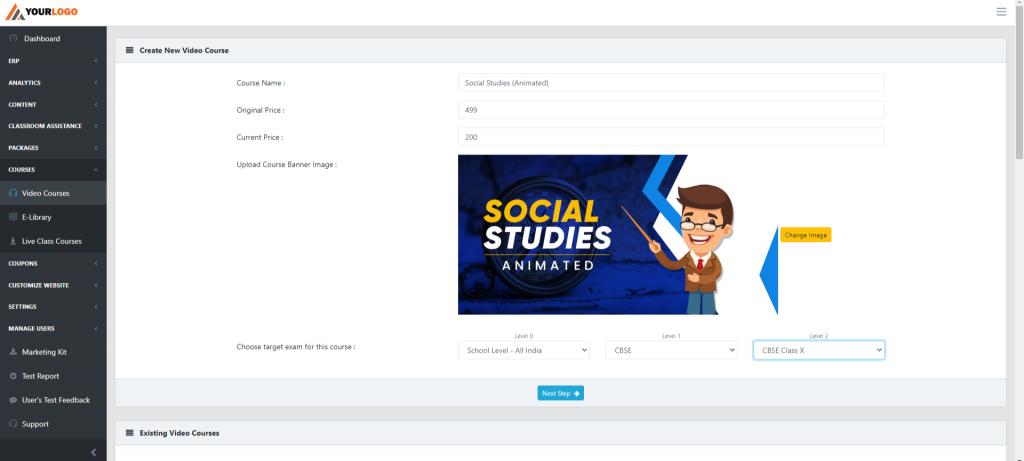
Step 2: Set Price, Upload Banner, and Choose Exam
To create a video class course you have to set a price for it. To make your course more lucrative with the ‘perception’ of a discount, you have to enter ‘Original Price’ , and then the ‘Current Price’. Few videos in a course can also be made ‘Free’ as detailed in the Step below.
The option to upload Banners gives a ‘visual touch’ and ‘distinction’ to a particular course, when it is listed with others on your website. Next you have to select a target exam.
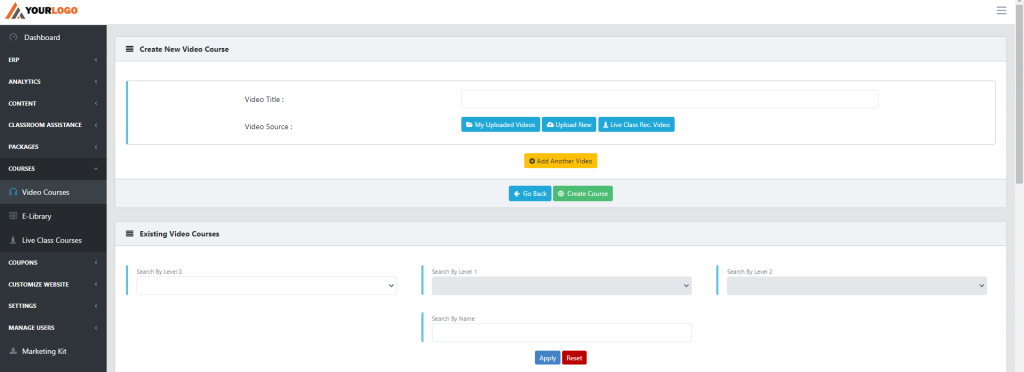
Step 3: Upload Your Videos
You would have 3 options to choose from for including a video in a course:
- Choose a video that has been previously uploaded.
- Upload a new video on the servers.
- Choose a previously recorded LIVE Class Video
You can make a video as ‘Free to Watch‘ after the upload has been completed.
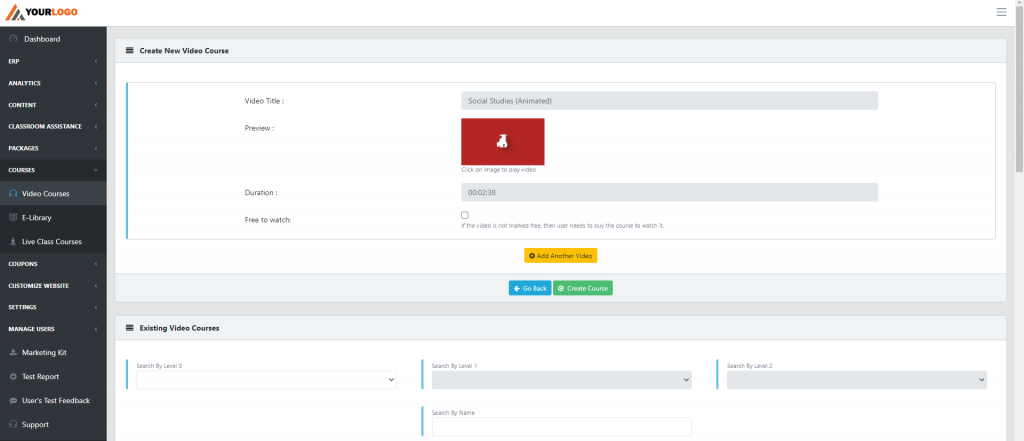
Finally create the course by selecting ‘Create Course’ option. The newly created course would be visible in the ‘Existing courses’ section below.
Step 4: Modify the Existing Courses
You can modify the existing video courses by clicking on the ‘Videos’ options in the rightmost column.
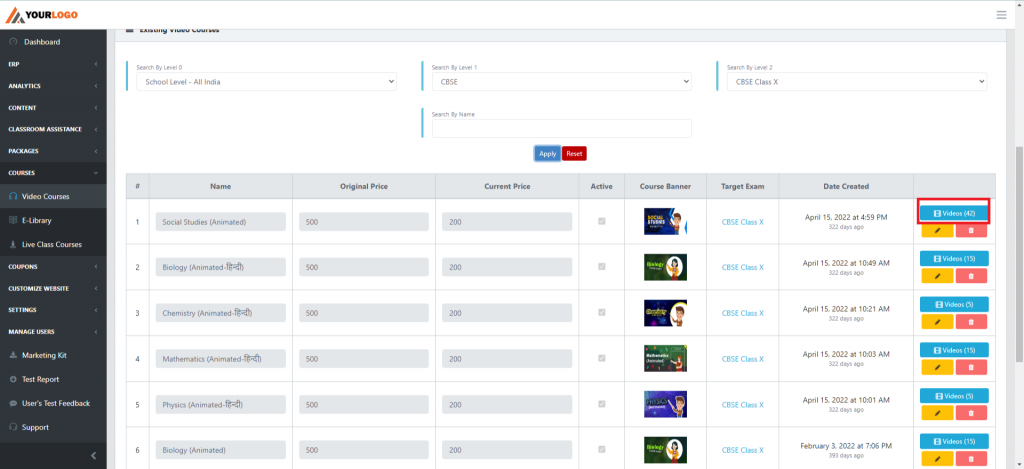
A new popup would appear presenting new options to the educators. They can mark their uploaded videos as free, see statistics for uploaded videos, add videos, and delete them.
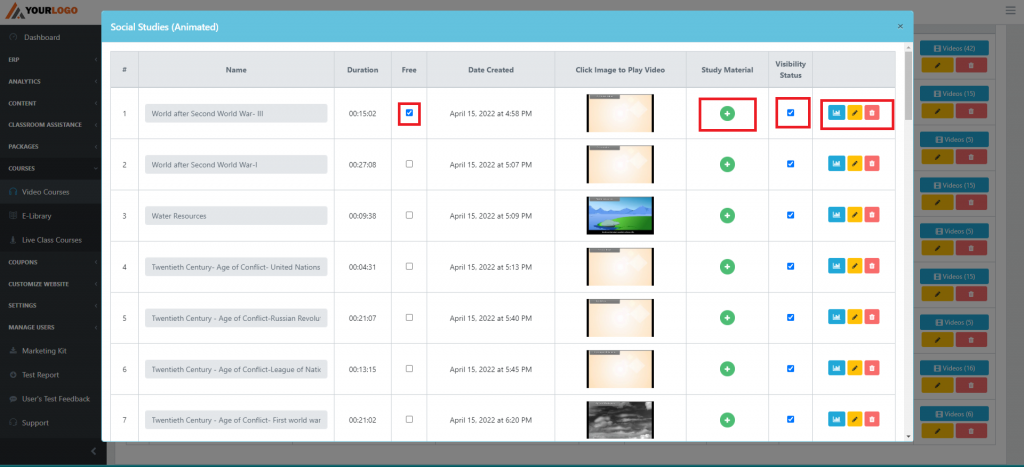
Educators also have the option of providing ‘Study Material’ – eBooks/PDFs-with their videos.
That summed up the guide upon Gibbon’s LIVE Class & Video Course Add-On.
In case clients still have any doubt or want to enable any Feature or Add-on for their portal, please do:
- Contact EduGorilla’s Support Team on the number: (+91–6393209453)
- Write a mail to [email protected]
- Contact EduGorilla’s Sales Representative


")