
Gibbon PLUG & PLAY solution provide an optional Add-On for Exam Page to educators. This Add -On enables educators to provide their own content on the ‘Exam Page’. Exam Page Add on also lets educators to provide SEO details for helping their pages rank higher on search engines like Google or Bing.
Gibbon’s Exam Page Add-On is an important marketing tool for educators to connect directly with their current & prospective students. Through this Add-on educators can give helpful insights about the exam, promote offers, give schedules, and other details. Read below for step by step guide for using the Add-on.
NOTE:
This is a ‘paid’ Add-On of Gibbon, unlocked on subscription.
Regarding any queries:
– Contact EduGorilla’s Support Team on the number: (+91–6393209453)
– Write a mail to [email protected]
– Contact EduGorilla’s Sales Representative
Prerequisites
- Clients must have ‘Admin Access’ to the portal/website.
- Clients must have activated the Add-On service for the portal/website.
How to Customize Exam Page?
The steps involved in Exam Page customization are given below.
STEP 1: Access The Admin Portal
The first step is to access the admin portal. For this, just type the URL of your Whitelabel site, and Log in using Admin Credentials.
After successful login, the drop-down will be visible. Click on it & select ‘Admin Panel’ Option.
STEP 2: Access the Module
Once on the Admin Panel, follow the path given below:
| Path: Dashboard > Customize Website > Customize Webpages > Exampage |
STEP 3: Select the Exam, and Create New Exam Page
First select the exam for which the page has to be modified. To do this set correct parameters for Level 0, Level 1, & Level 2.
After selecting the exam click on Create New button below the Levels.
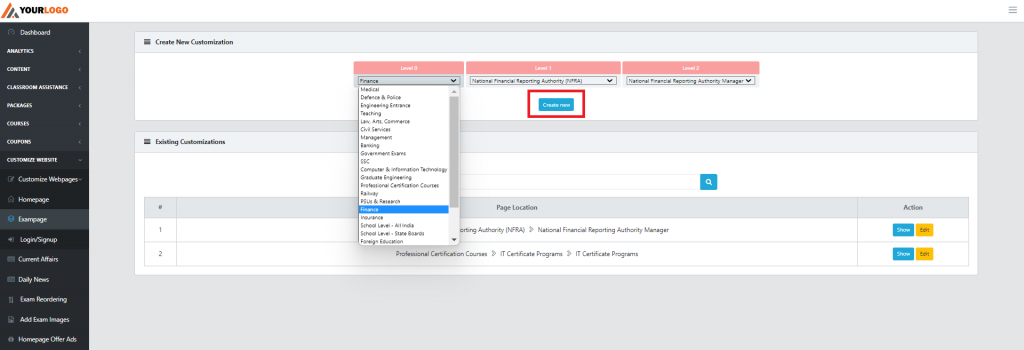
A new page would open, which would have multiple elements. Lets take up the elements one by one.
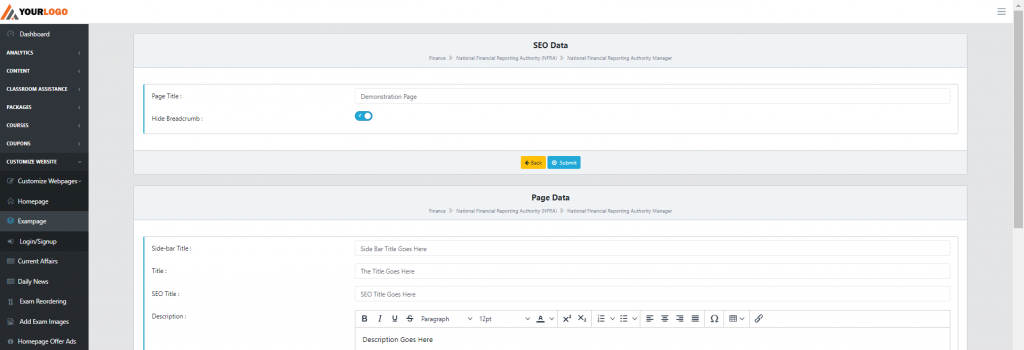
SEO Data
Client can enter the SEO title for the exam page. The SEO title would be shown on the SERP (Search Engine Research Page) such as Google, Bing. After completing click on Submit.
Page Data
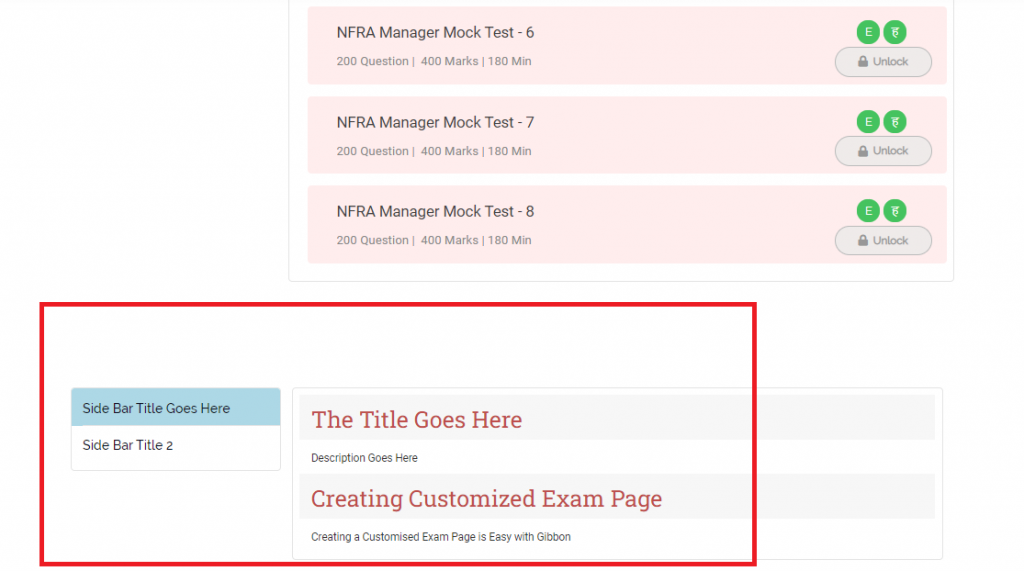
Here the user has to input Side Bar Title, Title, SEO Title and Description. The respective places where the elements would go is shown below.
To add another heading, click on Add Field button, after completing click on Submit.
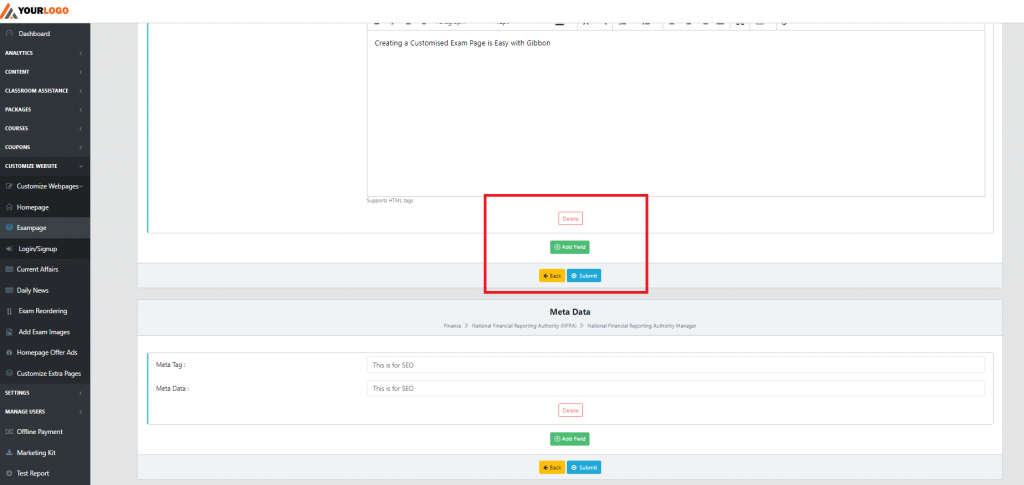
Meta Tags
Again this is for SEO purpose. After completion click on Submit.
STEP 3: Reviewing the Finished Page
After entering the fields, click on any of the multiple Back buttons present on the page. On returning to the home screen, the newly customized page would be listed below. There would be two options – Show, & Edit. To review the finished page, click on Show.
With the last step, the Exam Page customization process is complete. If clients wants a demonstration of the steps mentioned above, they can view the narrated videos attached below.
How to Customize Exam Page?
In case clients still have any doubt or want to enable any Feature or Add-on for their portal, please do:
- Contact EduGorilla’s Support Team on the number: (+91–6393209453)
- Write a mail to [email protected]
- Contact EduGorilla’s Sales Representative


