
Gibbon is a PLUG & PLAY solution offered by EduGorilla, which facilities educators, and content creators to scale their business online . As a part of its services, Gibbon provides an ‘add on’ facility of Classroom Assistance to clients.
Classroom Assistance Add-On lets educators to deliver tests to a selected group of students, and that too within seconds! The Add-On also enables educators to ‘manage’ their enrollments by adding students into different ‘Classrooms’. The article contains the guide to Gibbon’s Classroom Assistance Add-On.
NOTE:
This is a ‘paid’ Add-On of Gibbon, unlocked on subscription.
Regarding any queries:
– Contact EduGorilla’s Support Team on the number: (+91–6393209453)
– Write a mail to [email protected]
– Contact EduGorilla’s Sales Representative
Prerequisites
- Clients must have ‘Admin Access’ to the portal/website.
- Clients must have activated the Add-On service for the portal/website.
As said in the intro, Gibbon’s Classroom Assistance is an intuitive tool to quickly create classrooms, and then schedule tests for them. Here is a video how it is done.
In case the above video was long, given below are the steps to perform a specific action.
How to Add Users?
Adding users basically creates a profile of the student on your system, which then can be assigned to different classrooms. The steps are:
Step 1: Admin Portal > Dashboard > Classroom Assistance
Visit the admit portal of your webpage, and once on the Dashboard go to Classroom Assistance. A list of sub options would be displayed
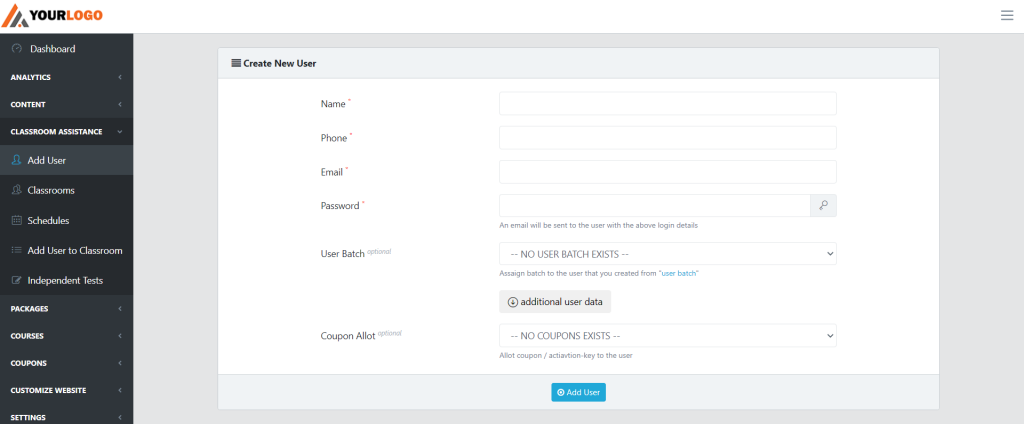
Step 2: Classroom Assistance > Add User
New User Profile can be created by providing Name, Phone, E-Mail, Password, and other details. After entering details click on ‘Add User’.
Bulk Sign Up
If availed, Bulk Sign Up option would be available in the Add User module of the Classroom Assistance.
Path: Dashboard>Classroom Assistance> Add User
Details about the option are provided in the article below.
How to Create Classrooms?
Creation of ‘Classrooms’ involves the following steps:
Step 1: Admin Portal > Dashboard > Classroom Assistance
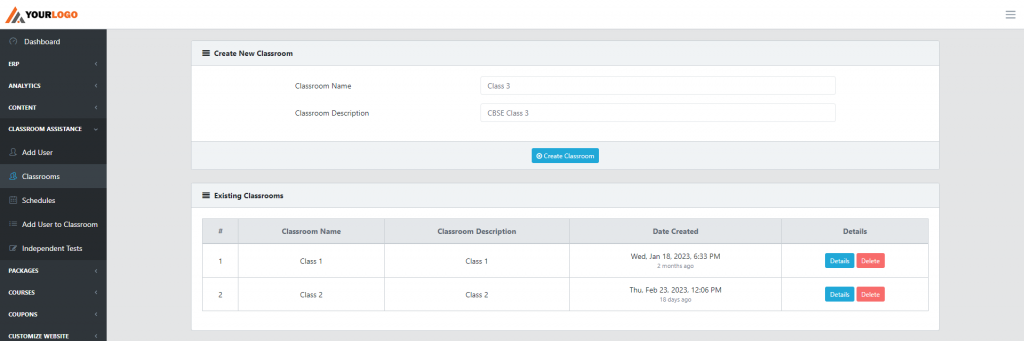
Step 2: Classroom Assistance > Classrooms > Create Classroom
Create a classroom by providing the relevant information. You can also see existing classrooms, and remove them if needed.
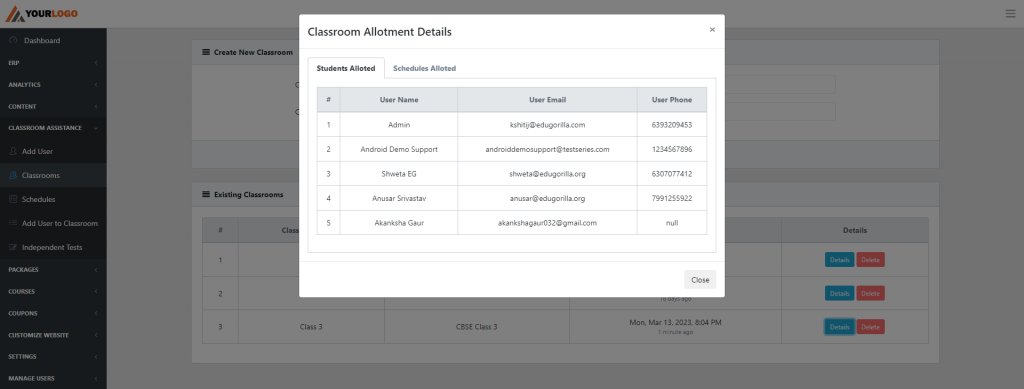
Step 3: After a Classroom has been created. Click on the ‘Details’ tab to view the students allotted to the class, or the schedules assigned to it. A newly created class would have all the lists as empty, so follow the next steps to assign students to class, and add schedules.
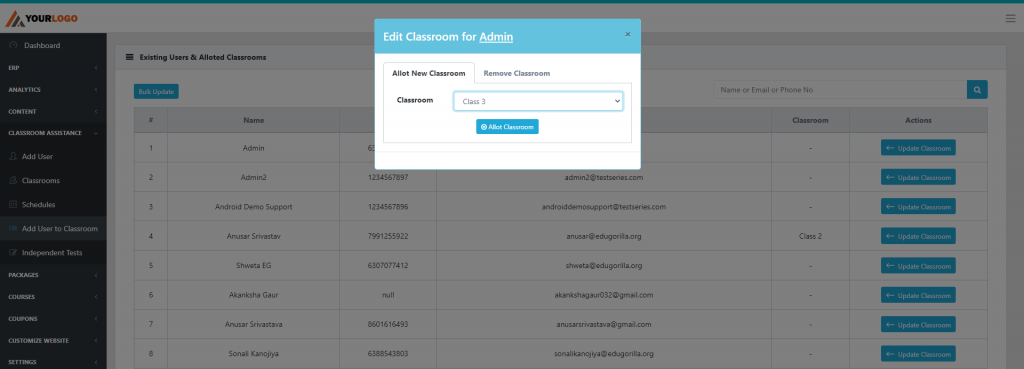
How to Assign Classrooms to Students?
Step 1: Classroom Assistance > Add User to Classroom
The page will display all the students and the respective classes allotted to them. On the top left corner an option of Bulk Update has been given to assign multiple users to a class in a single go.
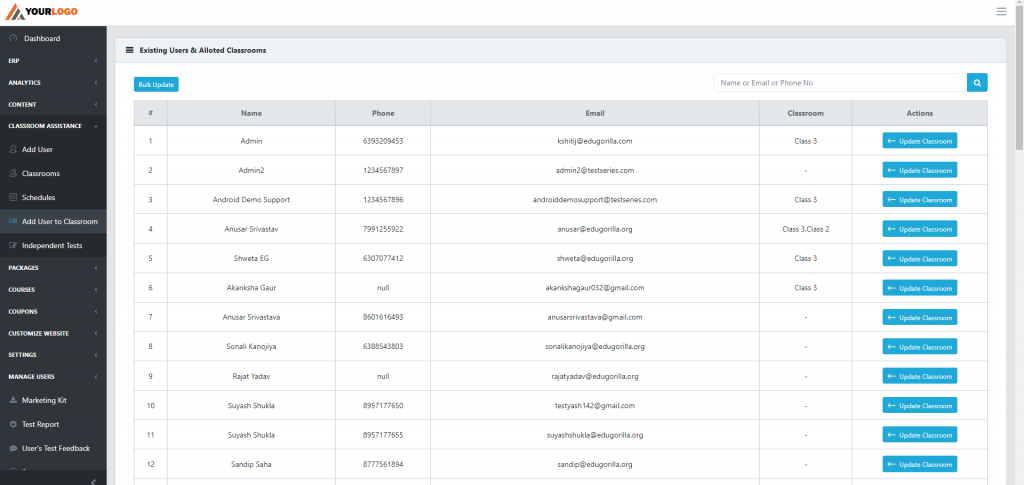
Step 2: Add User to Classroom> Update Classroom
You can change the assigned class to a user by clicking on the Update Class option. Upon clicking this option a list of user profiles would be displayed. Educators can then assign classrooms to the student.
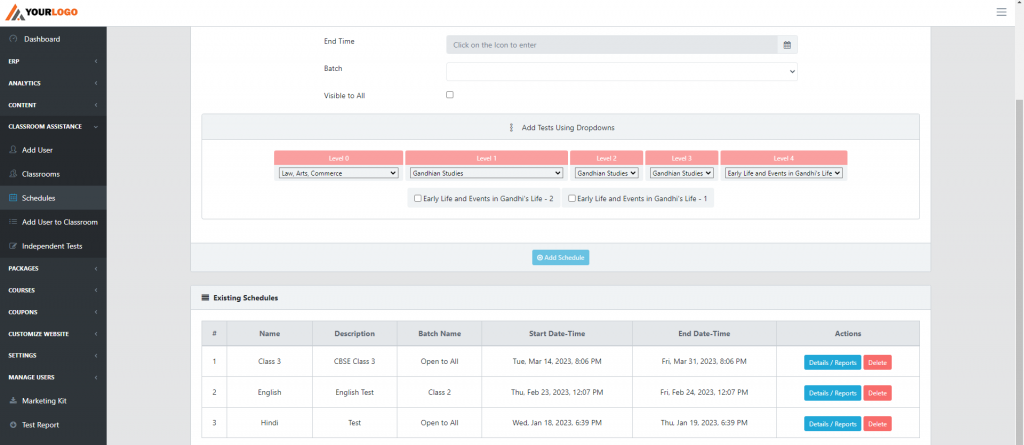
How to Schedule Tests?
The steps to schedule tests are as follows:
Classroom Assistance > Schedules
The page will display the option to add a new schedule as well as existing schedules. To add a new schedule simply decide the End Time, Batch, and Levels. Finally select the levels of the schedule, and click on ‘Add Schedule’. The test schedule would be created.
How to Schedule Independent Tests?
Process to schedule independent tests is simple, just pick the exam through the Levels, select a exam by clicking checkbox, and click on Submit button.
How to View Test Result/ Student Report?
The steps to view reports are as follows:
Classroom Assistance > Schedules
After a schedule has been successfully executed, the reports of the students would be available in Details/Reports tab. Educators will have the option of viewing the report, downloading it as pdf or csv, and mail the report to respective students.

In case clients still have any doubt or want to enable any Feature or Add-on for their portal, please do:
- Contact EduGorilla’s Support Team on the number: (+91–6393209453)
- Write a mail to [email protected]
- Contact EduGorilla’s Sales Representative


